
Step by step with When Works For You
1. Create an Event
The first thing to do is create an event. When you create an event, we collect some information that will describe your event to guests like your name, a title and a description. This information will be shown when guests respond to your request. Then, pick a few possible dates for your event - your guests will get to choose from these. Finally, select one of two options for inviting your guests:
- automatically have When Works For You email them for you
- create a link you can send to them
What happens next?
That depends on how you decide to invite your guests:
| Automatically email my guests | Create a link... |
|---|---|
| When Works For You will send an email to each of the addresses you provide with a unique link that your guests can use to respond. Check out what a sample invitation message looks like | The next step is up to you. Copy the unique link created for you and send it to your friends. You can do this however you like - create your own email invitation, put the link on a web page, send it to a mailing list, or post it on your favorite social networking site. |
2. Watch the responses come in
As your guests visit When Works For You, they will be asked to provide a name and a "Yes", "Maybe", or "No" response for each possible date for the event. They can also enter a comment for other guests to see. If other guests have already responded they can see their responses.
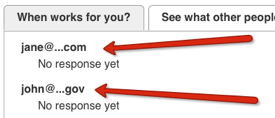 If the event was created with a communcation option of "Automatically email my guests" this page will also show who is invited - even if they haven't responded yet.
We respect your guests' privacy and only display a portion of the email address.
If the event was created with a communcation option of "Automatically email my guests" this page will also show who is invited - even if they haven't responded yet.
We respect your guests' privacy and only display a portion of the email address.
Once guests have responded, they will be provided a unique link to be able to modify their responses in the future or check back on the status of the event. They can also choose to stay up to date by receiving email updates or RSS feed for the event.
3. Pick a date
As guests respond, When Works For You will tally the votes and provide a summary of how guests have responded for each date. The summary shows the percentage of "Yes" "Maybe" or "No" responses for each date. Armed with this information, you can pick the best date for your event!
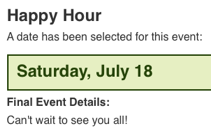 To pick a final date, click on the "Pick this date" link under the date you would like to choose. You will be given the option to add any final event details like location or time.
Once the final date is chosen, the date will appear at the top of all pages related to your event. If you created the event with a communication option of "Automatically email my guests" then
When Works For You will also email the final details to all your guests.
To pick a final date, click on the "Pick this date" link under the date you would like to choose. You will be given the option to add any final event details like location or time.
Once the final date is chosen, the date will appear at the top of all pages related to your event. If you created the event with a communication option of "Automatically email my guests" then
When Works For You will also email the final details to all your guests.
4. Have fun at your event!
That's it! If you have any questions, feel free to contact us; otherwise - get started and create an event today!